How the Water Rocket Pictures Were Made
The same concept is used as in the water balloon pictures,
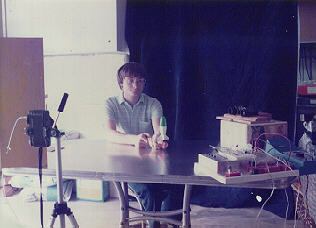
except I improved the setup this time. Instead of using an
old fashioned movie projector as the source for a light beam,
I used an infra-red LED focused through some binoculars creating an
invisible beam of infra-red light passing across the table
to the sensor on the other side. This way the beam of light
wouldn't show up in the picture.
It was rather difficult to focus the beam of infra-red light
on the sensor at the other side of the table because we
couldn't see it. We had to rely on a meter measuring the
strength of the received beam and move the binoculars around
until we arrived at the maximum level.
The electronics for this setup were fancier as it allowed
for an adjustable delay between the time the beam is
broken and the camera flash is triggered.
There were some extra difficulties when taking these
shots. First of all since we couldn't see the
infra-red beam of light going across the table
I wasn't sure exactly where to position the
rocket so it would pass through the infra-read
beam when launched. Finding the beam took some
time, again looking at the meter measuring the
strength of the received beam to tell us when
the beam was broken.
Another problem was launching the rocket itself.
The rocket typically travels upwards about 40
feet in a second with great force. Our garage ceiling
is only about 12 feet high, so a rocket catcher
device had to be built and attached to the
ceiling to catch the rocket after it was launched.
 Back
Back